Configuring E-mail for Known E-mail Providers
Brief
This section describes how to configure e-mail settings for the following e-mail providers: AOL Mail, Gmail, Hotmail, Lycos Mail, MSN Mail, and Yahoo!
Details
To make configuring of e-mail settings easier, FX Trading Station provides the E-mail Configurator wizard. You can use the wizard at any time even when you are not logged on FX Trading Station.
To start the wizard, do one of the following:
The wizard starts, collects information about your accounts, and then
the Choose an Account page appears.
Step 1: Select the check box next to the account or accounts for which you want to configure the e-mail settings, and then click Next.
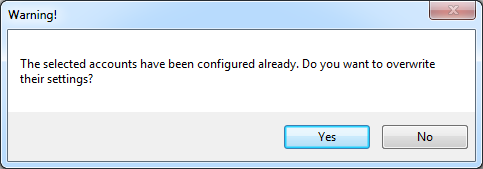
Note: The warning message "The selected accounts..." appears
if you select the accounts that have been configured already. Click Yes
to assign new e-mail settings to the accounts and overwrite the old ones.
Click No to select other accounts to configure.
The Warning! message [show]
Step 2: The Choose an E-mail Provider page appears.
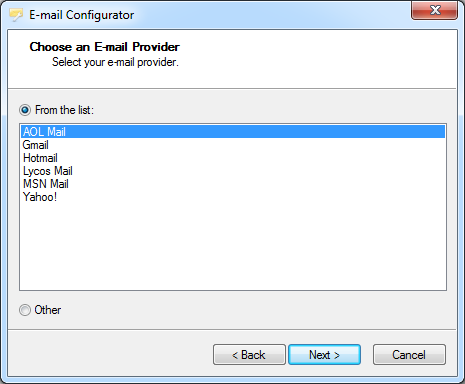
Select the e-mail provider you use, and then click Next.
Step 3: The E-mail Account Settings page appears.
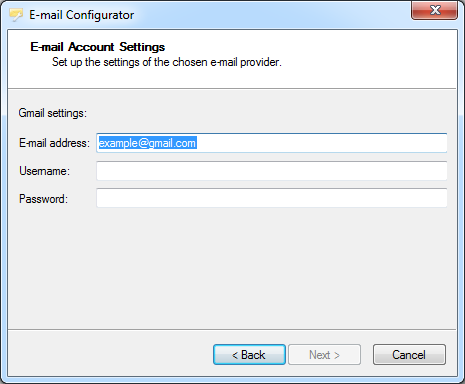
3.1 Specify your e-mail settings:
Note: The username is usually the same as the e-mail address.
3.2 Click Next.
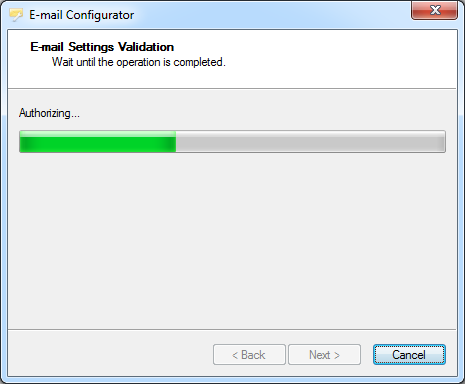
Step 4: Wait while the E-mail Settings Validation progress page is being displayed.
The E-mail Settings Validation page [show]
Note: During the validation, the wizard tries to connect to the mail server and pass authentication.
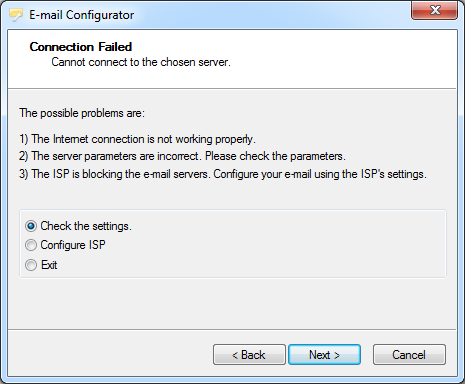
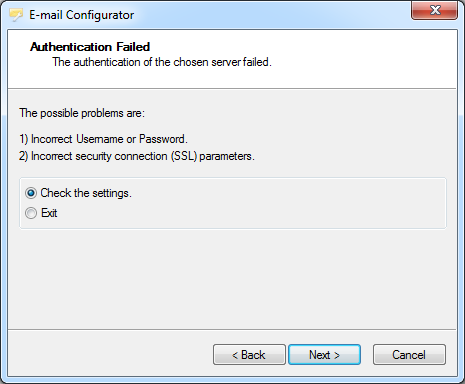
Step 5: Proceed in accordance with the instructions of the page that appears. It can be one of the following:
The Test E-mail Message page [show]
The Connection Failed page [show]
The Authentication Failed page [show]
Step 6: The Test E-mail Message page allows to send
a test e-mail message and verify the configuration finally.
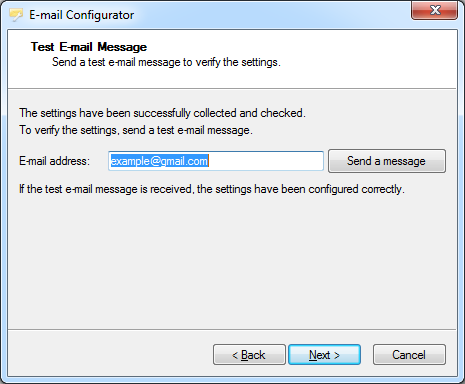
Click the Send a message button.
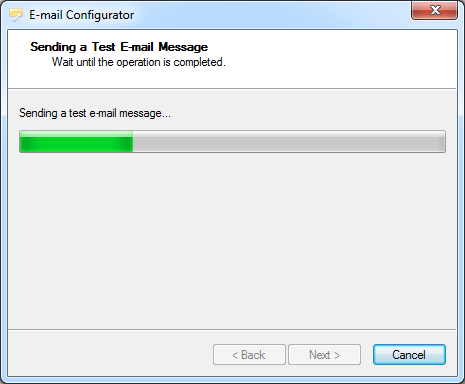
Step 7: Wait while the Sending a Test E-mail Message progress page is being displayed.
The Sending a Test E-mail Message page [show]
Step 8: Check your mail box, and, if the test e-mail message is received,
on the Test E-mail Message page, click Next.
If the test e-mail message is not received, see What To Do If Test E-mail Message Is Not Received?
The Test E-mail Message Content [show]
Step 9: The Finish page appears.
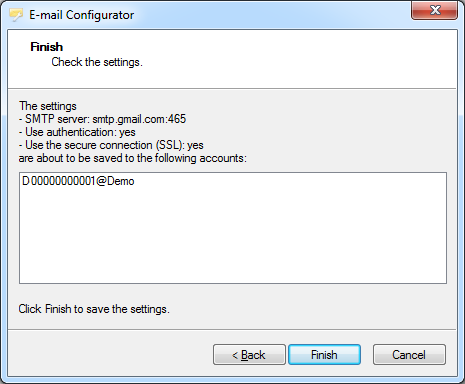
Check the e-mail settings and accounts, and then click Finish.
The wizard saves the e-mail settings and closes. Now you can configure a strategy or alert to send e-mail notification messages:
| Articles | |
|
What To Do If Connection Fails? This section describes what to do if the wizard fails to connect to the mail server. |
|
|
What To Do If Authentication Fails? This section describes what to do if the wizard fails to pass authentication on the mail server. |
|
|
What To Do If Test E-mail Message Is Not Received? This section describes what to do if the test e-mail message is not received. |